Showing posts with label recycle. Show all posts

Monday, January 11, 2010

New Year's Resolution: Get Organized!


Aside from losing weight, it seems like the next most common New Year's Resolution is to get organized. Need a little help?

The current trend is to buy coordinated boxes to hide the clutter, but these can be expensive and may not come in colors you like. This project uses a common office waste product—boxes that hold pre-printed letterhead—to help you bring elegant and affordable order to your home.

These instructions include measurements for a standard-sized stationery box. If you choose a different box, you’ll need to measure its dimensions and do the math yourself.

What you need:
  • Stationery box
  • Wrapping paper
  • Ruler
  • Pencil
  • Paste
  • Waxed paper

What to do:
  1. Cut two pieces of wrapping paper—26 11/16” across by 29 3/16” tall for the base, and 15 11/16” across by 18 1/4” tall for the top--either from the same roll or from coordinating rolls. Be sure to use a straight edge, and if necessary a T-square, to keep your cuts square.
  2. On the larger sheet, draw a line 8 1/2” in from each margin. The center rectangle marks where the box bottom will go. Cut along the lines to remove the square from each corner.
  3. Apply a thin and even coat of Yes! brand paste to the center square of the larger piece of paper. (Tip: An old credit card works great as an applicator.) Position the box on the glued area and smooth the paper to remove air bubbles.
  4. Lay down a drop cloth of waxed paper and apply paste to one of the short flaps. Press the paper firmly against the outside of the box, and then fold the remaining paper to the inside of the box. Burnish again to remove air bubbles. Repeat with the remaining flaps, being sure to change out the waxed paper each time. (Note: If you’re worried about exposed corners, cut your shorter flaps 1” wider and glue these wings in place underneath the longer flaps.)
  5. Now finish the box top. On the remaining sheet, draw lines 2 7/8” from each margin. Cut out the corner sections and follow the steps three and four to adhere the paper to the lid.
(It's no secret that I love recycling, and this post is no exception. I originally posted it in November 2007, but I wanted to share it again since I felt it was especially timely.)

Friday, September 18, 2009

Tick-tock: Time to get moving!

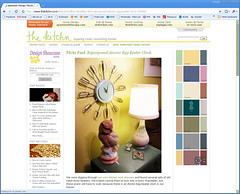
What a week! I'm so excited to say that my atomic eggbeater clock was featured on TheKitchn.com, a sister site of ApartmentTherapy.com. Woo-hoo! A million thanks to Sarah, the editor who contacted me, for spotting the clock on Flickr and deciding to feature it. Here's the direct link.

It's awesome to have exposure on such a well known national site, and my mind was reeling with the possibilities of what could come from this. I made sure to list the clock for sale in my Etsy shop, just in case anyone saw the blog post and decided right away that their life wouldn't be complete without one.

And adding the clock to Etsy brought it some additional attention. It was also featured in a Treasury page last week titled "Retro Kitchen."

Etsy Treasury -- Retro Kitchen

I have another exciting venue for the clock up my sleeve, but I can't say anything else about it right now. Just keep your fingers crossed for me that it all works out!

In the meantime, I need to find a reliable source of affordable beaters so that I can produce plenty of clocks, both to sell on Etsy and at craft shows and possibly to wholesale to boutiques. I normally buy the beaters at thrift stores and on eBay, but the supply can be somewhat unpredictable. Brand new replacement beaters are easy to find, but they sell for about $15 bucks a pair. Ouch.

My clever boyfriend suggested that I contact the companies that make the electric mixers and see if they'll tell me where they get their beaters. Surely there must be some factory seconds that I could snap up for a song. My guess is it will take more than a few calls, but hopefully it will be worth it.

Thursday, October 30, 2008

Happy Halloween!

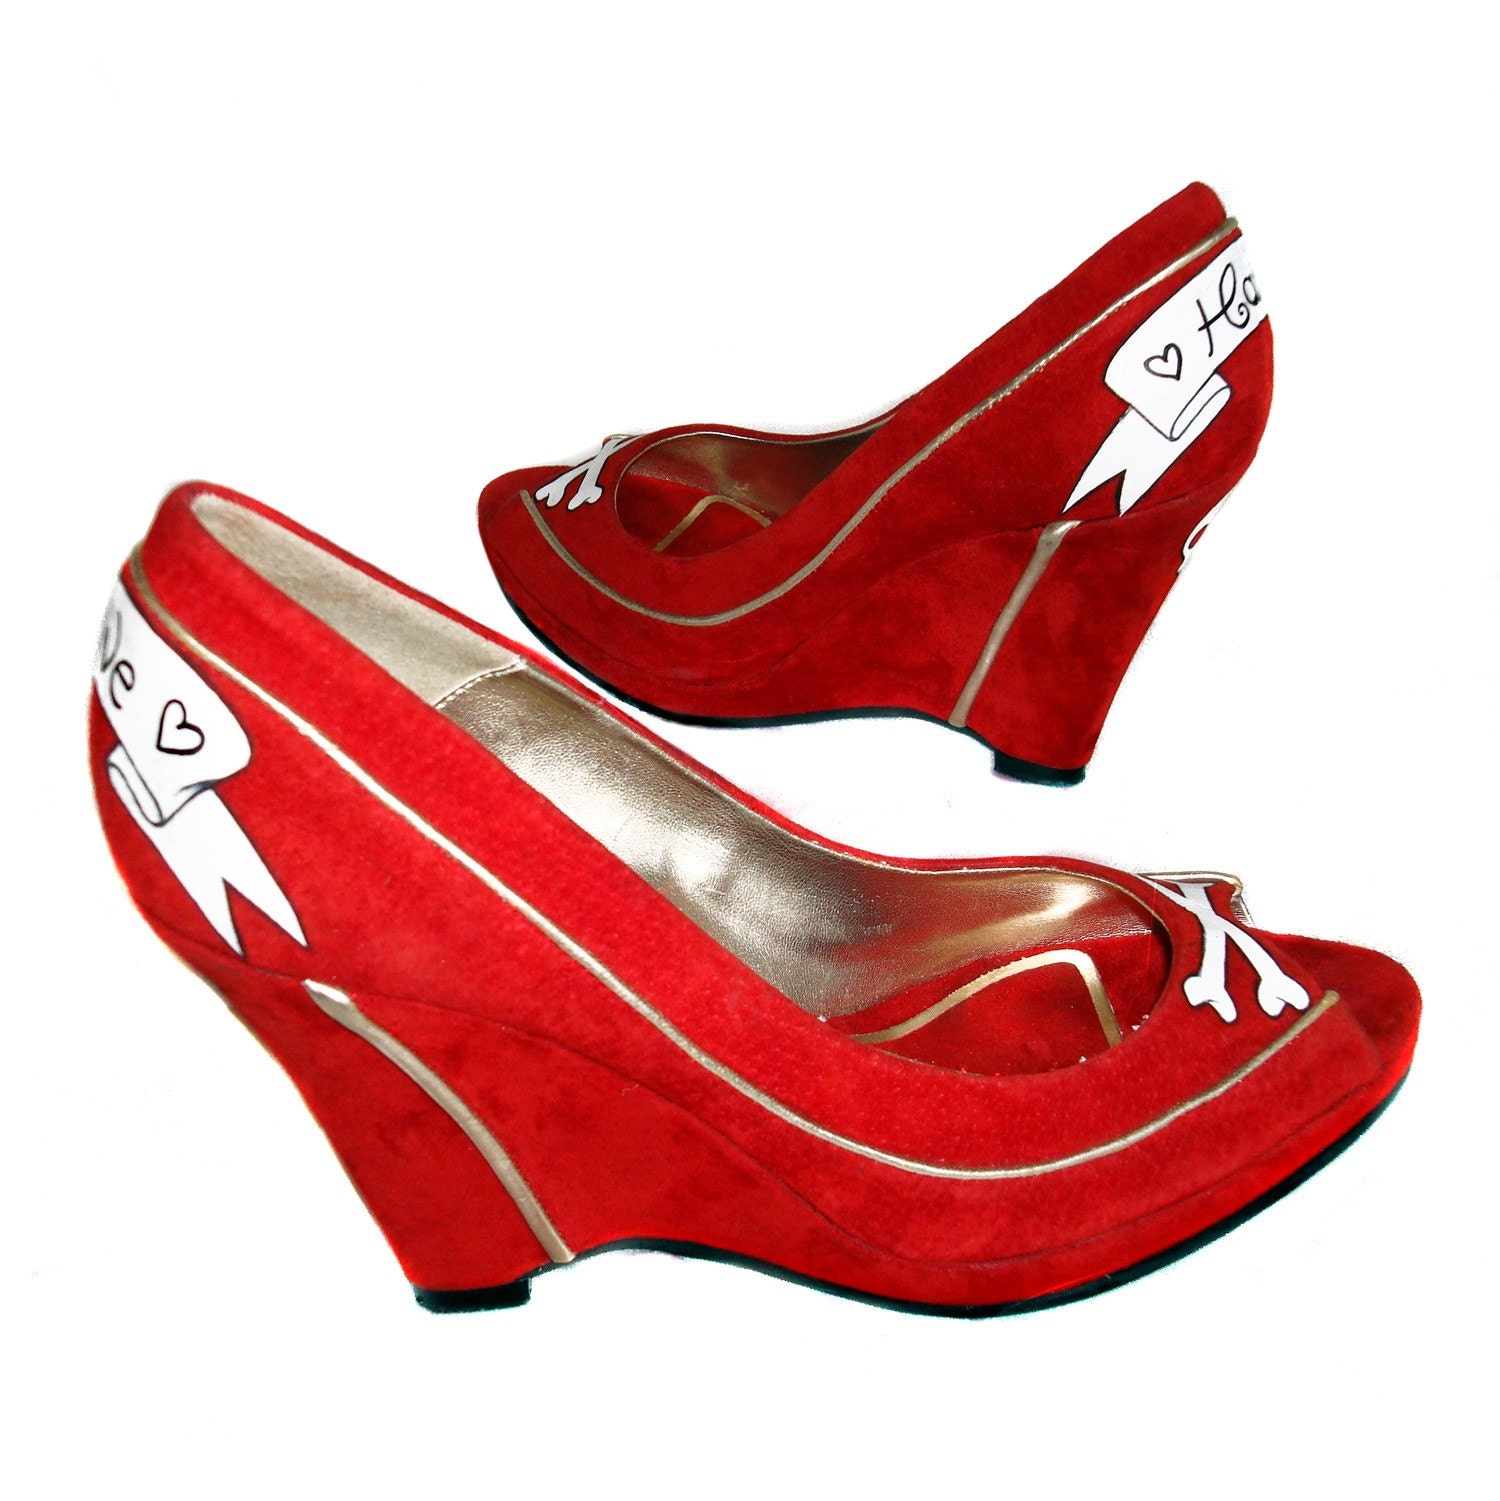
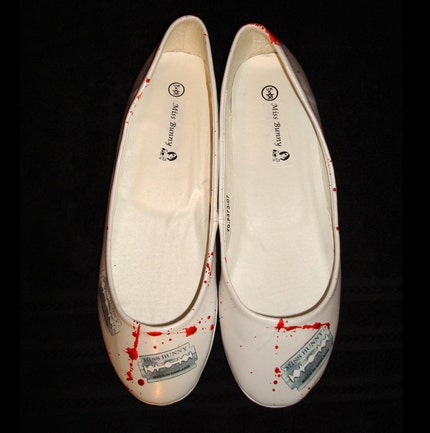
Tomorrow's Halloween, my favorite holiday! I'm still deciding what I'll dress up as for the two parties I'll be attending (post-event photos to follow). In the meantime, I couldn't resist sharing these fabulous shoes with you. 

Miss Bunny takes gently used shoes and upcycles them into one-of-a-kind creations. 

Check out these love/hate wedges in apple red. Wouldn't they just be spectacular with a vintage pin-up girl outfit? I'm picturing a pair of short shorts and a cute blouse, along with a swanky 19040s hairdo.


And then there are these blood-spattered shoes with razor blades on them. Perfect for that gory nurse outfit! 


Miss Bunny also made some bat heels that'll make you flip. I'm thinking they'd look great with an understated black strapless dress, some black opera-length gloves, and a little black hat with a veil. 


Well, I hope all of you have equally smashing costumes to wear. My guess is that if you're reading this blog, you probably have the creative costuming bug in you.

Have a fabulous Halloween!


Saturday, October 18, 2008

Easy Art!


Easy Art!
Originally uploaded by sassycrafter
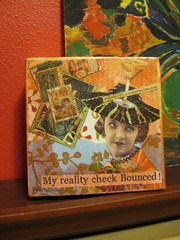
If you're looking for some affordable new art to hang on your wall, look no further than your napkin drawer. A number of manufacturers are making paper napkins that are so beautiful they're almost art. All you need to do is attach a napkin to a canvas, add a few finishing touches, and you'll have a new masterpiece.

What you need:

+ Napkin
+ Canvas
+ Paint
+ Paint brush
+ Scissors
+ Gel medium
+ Embellishments

What to do:

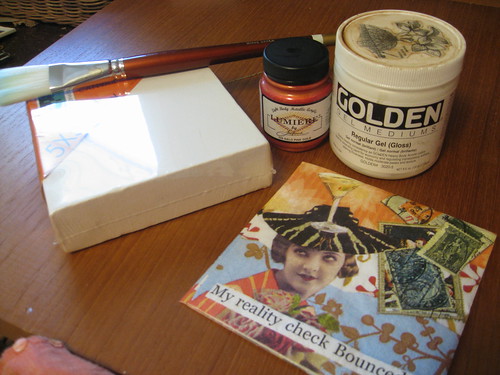
1) Artsy gift stores and galleries often stock unique cocktail napkins so look there for a napkin that suits your artistic taste. Then visit your local art supply store and buy a canvas that's slightly bigger than your napkin. If you'd like to pay homage to Andy Warhol, you can repeat four images on one canvas--just buy a larger canvas. Assemble your supplies.

Assemble supplies

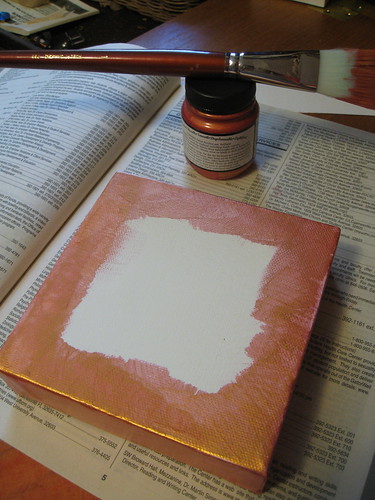
2) Paint the edges of the canvas using a color that coordinates with the napkin and let dry. (Tip: Use an old phone book to protect your work surface and you'll have a clean surface each time you turn the page.)

Paint edges of canvas

3) Trim the napkin to fit the canvas and attach using gel medium. Then add a top coat of gel medium.

Add top coat of gel medium

4) Attach a few embellishments to add depth and texture--a used postage stamp, a few beads to act as a necklace and earrings, and a word from a vintage dictionary. You're done! Hang your new art on the wall and enjoy.

Remember that the artwork on these napkins is copyrighted, so don't try selling these canvas creations on Etsy or eBay!

This tutorial originally appeared in the October issue of The Satellite.

Tuesday, July 15, 2008

Cool new online magazine


There's a great new online magazine I stumbled across called Refueled. I describe it as a magazine for people who enjoy searching for well-worn, gritty, rusty, and otherwise interesting stuff from flea markets found at the end of limerock roads. Collectors of objets d'art from everyday life.


If you dig the e-zine, you can also visit the companion Refueled blog. And if you still crave more design eye candy, visit Urban Prairie, the Web site of Refueled editor-in-chief Chris Brown. I love his stuff, even if some of it is slightly disturbing (e.g., a birdcage full of baby-doll heads).

Saturday, June 21, 2008

This just in! I'm in a book!

Sweater Surgery
I'm so excited I can barely contain myself -- my projects are now featured in a book! 

Sweater Surgery by Stefanie Girard is hot off the presses and contains four of my purses. You can find it on Amazon, or you can call your local independent bookstore and ask them to order it for you.

Here's a rundown of the four purses that are featured:
  • Cheerleader purse--Full pattern and directions (written by me) on pages 38-39. Also appears on pages 8 and 113.
  • Erika purse--Named for my friend Erika, who I gave this purse to for her birthday but who was kind enough to lend it back to me to send to the publisher for photographing. Basic construction info listed on page 93. Also appears on pages 7 and 92.
  • Cindy purse--Named after the woman who sold my first sweater purse through her store, Sun Center Bead Emporium (sadly, now closed). Featured on p. 94 and also appears on page 5.
  • Joan purse--Named after my dearest mother, who was kind enough to sacrifice her Kenmore sewing machine to me back in the early 1980s. Described on page 95 and also appears on page 5.
You can click on the purse names above to link to photos of these purses in my Flickr photostream.

Thursday, April 03, 2008

Big stores and crafty recycling

Apparently, Macy's is now interested in crafty recycling projects. I got their latest flyers in the mail, and the kid-centered flyer was chock full of projects made from recycled materials.

In this photo, you can just see the flower made from recycled water bottles peeking out from behind the cute little girl.

These boys are living out their Tom Sawyer dreams on a raft made from water cooler jugs.

On this page, they prompt readers to make a birdhouse out of an old coffee can. (Come on, does anyone get their coffee in something other than a Starbucks cup these days? It is a cute idea, though.) I've got to say that my favorite is the turtle in bottom half of the page. I think his neck is made out of an aluminum dryer vent hose. I'm not sure what framework they used for the shell, though it looks like it's stuffed with green plastic bottles.

And finally, more flowers!


If you want to see any of the images in a larger size, feel free to visit my Flickr site.


Soft cube

I saw this softie cube at Ipso Crafto, a cool craft store in the Eastern Market area of Washington, D.C.

I thought the cube was a great way to use up old scraps of fabric and ribbon. The little ribbon tabs are perfect for little hands to grab onto! Plus, the felt cutouts with embroidery help kids learn words and images.

I'm guessing that this is how it's made.

  1. Cut six squares of equal size.
  2. Cut loops from scrap pieces of ribbon and pin to the squares.
  3. Sew the squares together to form a cube, leaving a small opening in one of the seams.
  4. Stuff the block with cotton or polyester filling, and then whipstitch the opening closed.

You also could probably use some of that non-scratchy velcro to allow the cubes to be stacked together.

If you live in the Washington D.C. area or are visiting, be sure to visit Ipso Crafto. They're just a short walk down 8th Street from the Eastern Market metro station and have a cool assortment of craft books and supplies.

Tuesday, February 05, 2008

Happy Mardi Gras!


Repurposed chandelier
Originally uploaded by sassycrafter
For all of you who lugged home piles of beads from Mardi Gras and don't know what to do with them, here's the project you've been waiting for. This project also appears in the February issue of The Satellite Magazine, hot off the presses and available in North Central Florida.

  1. Pick up an old chandelier from a thrift store, remove the electrical parts, and dust it with a few coats of matte silver spray paint.
  2. Wrap four of the eight chandelier arms with pearls, securing the loose ends with wire and a dab of glue.
  3. On the remaining four arms, use jump rings to swag pearls underneath the arms.
  4. Finally, add tea lights to the cups where the lights used to be.
Now all you have to do is light the candles, pour yourself a mint julep, and start enjoying the warmer evenings on the porch.

Sunday, January 06, 2008

Clever keychain


Thanks to Cat for inspiring this project, which will be featured in the January issue of The Satellite magazine. It's a great way to use up odd beads leftover from previous projects. All you need is some leftover beads, flex wire, a couple of crimp beads and some imagination.

So what's stopping you? Go bling out your keychain!

Monday, November 26, 2007

Elegant organization

Here's a preview of my December column for The Satellite. A big trend these days is to buy coordinated boxes to organize household clutter. Rather than buy them, why not make them? This project uses the stationery boxes that used to pile up next to the recycling bins at my old office. I simply recovered them with wrapping paper that matches my decor scheme. Voila! Elegant organization.

Here are the step-by-step instructions.

1) Cut two pieces of wrapping paper—26 11/16” across by 29 3/16” tall for the base, and 15 11/16” across by 18 1/4” tall for the top--either from the same roll or from coordinating rolls. Be sure to use a straight edge, and if necessary a T-square, to keep your cuts square.

2) On the larger sheet, draw a line 8 1/2” in from each margin. The center rectangle marks where the box bottom will go. Cut along the lines to remove the square from each corner.

3) Apply a thin and even coat of Yes! brand paste to the center square of the larger piece of paper. (Tip: An old credit card works great as an applicator.) Position the box on the glued area and smooth the paper to remove air bubbles.

4) Lay down a drop cloth of waxed paper and apply paste to one of the short flaps. Press the paper firmly against the outside of the box, and then fold the remaining paper to the inside of the box. Burnish again to remove air bubbles. Repeat with the remaining flaps, being sure to change out the waxed paper each time. (Note: If you’re worried about exposed corners, cut your shorter flaps 1” wider and glue these wings in place underneath the longer flaps.)

5) Now finish the box top. On the remaining sheet, draw lines 2 7/8” from each margin. Cut out the corner sections and follow the steps three and four to adhere the paper to the lid. For a final touch, cut two pieces of paper to fit inside the box top (9 13/16” by 12 3/8”) and bottom (9 9/16” by 12 1/16”). Paste in place.
Sunday, August 12, 2007

September preview


Here's a preview of my Sassy Crafter column for the September issue of The Satellite. I transformed an old card table into a fresh, new sewing table by decoupaging it with vintage pattern pieces.

I actually found the card table at the side of the road while I was driving home from running a few errands. Gotta love the suburban equivalent of dumpster diving!

At any rate, the table was in mostly working condition (a little WD-40 helped), but the overall look was pretty blah. I'd been wanting to do a decoupage project using old pattern pieces, and this seemed like just the canvas that I had been waiting for.

Want the same look? Here's how to get it.

  1. Use a regular-body acrylic gel medium to adhere the pattern pieces. That's all there is to it! Dontcha just love one-step tutorials?
Other adhesives would probably work--I just happened to have gel medium on hand. In retrospect, I probably could've laid on the pieces directly with polyurethane. Maybe next time I'll try that.

I brought the table to the recent Mamaw Menagerie at 2nd Street Bakery. To tell you the truth, I didn't feel like the piece was done yet. BUT...some nice gal offered to buy it from me, so I guess it looked finished after all! It just goes to show you that art, like beauty, is in the eye of the beholder. Thanks, Jen!

The Alligator also featured a nice write-up on the event, which you can read here.

LinkWithin

Blog Widget by LinkWithin