Showing posts with label repurpose. Show all posts

Friday, December 04, 2009

5-minute Anthroplogie inspired necklace

5-minute Anthroplogie inspired necklace
It's no secret that I love pretty much everything that Anthropologie comes up with. Earlier this fall, I got a promotional email that featured a beautiful necklace that caught my eye.

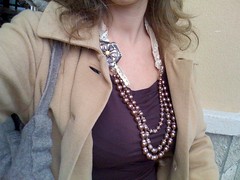
I decided that I could probably get the same look by repurposing a necklace that has been collecting dust in my jewelry box. So this morning before work that's exactly what I did. Yes, I'm an impulsive crafter. But hey, I was still on time for work and I had the perfect necklace to complete my outfit.

If you want to get the same look, here's what to do. Sorry I don't have step-by-step photos like I usually include in my tutorials, but I didn't want to be late to work!

1) Start with a three-strand, graduated, choker-style necklace.

2) Use jewelry pliers to remove the original clasp parts from both ends of the necklace.

3) Add a jump ring to each end of the necklace.

4) Thread a piece of vintage blanket binding through one of the jump rings, fold the ends under, and secure with Fabri-Tac glue. Repeat with the other end.

5) Pick a piece of vintage sewing trim that complements the look of your necklace and tie it onto one of the jump rings. Then loop it around the blanket binding several times and tie it off on the other jump ring.

6) Since I like assymetrical looks, I tied an additional length of trim to one of the jump rings and then pinned a vintage brooch just above the jump ring.

So, here's a shot of the original inspiration piece. Not bad, eh? Especially for just five minutes and $0 invested. I love repurposing.
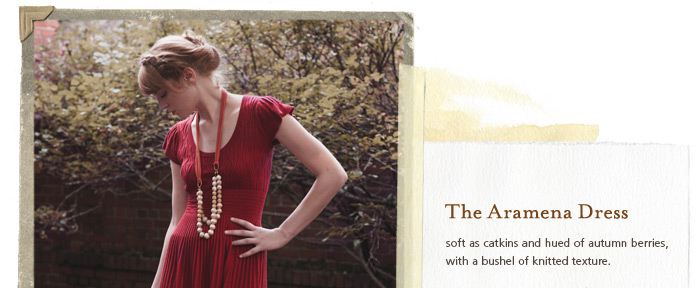
Anthropologie inspiration

(Please forgive the grayness in my own photo. I snapped it with my iPhone, which doesn't always take the best pictures. Plus, it was really overcast today.)

Friday, September 18, 2009

Tick-tock: Time to get moving!

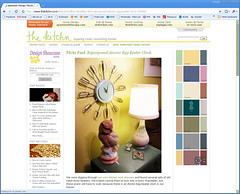
What a week! I'm so excited to say that my atomic eggbeater clock was featured on TheKitchn.com, a sister site of ApartmentTherapy.com. Woo-hoo! A million thanks to Sarah, the editor who contacted me, for spotting the clock on Flickr and deciding to feature it. Here's the direct link.

It's awesome to have exposure on such a well known national site, and my mind was reeling with the possibilities of what could come from this. I made sure to list the clock for sale in my Etsy shop, just in case anyone saw the blog post and decided right away that their life wouldn't be complete without one.

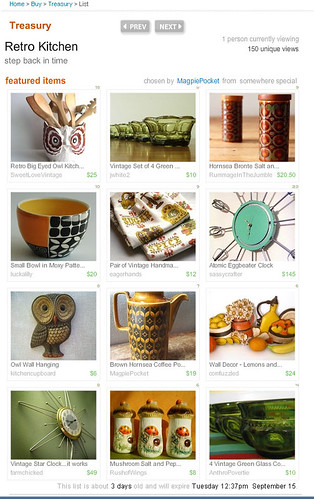
And adding the clock to Etsy brought it some additional attention. It was also featured in a Treasury page last week titled "Retro Kitchen."

Etsy Treasury -- Retro Kitchen

I have another exciting venue for the clock up my sleeve, but I can't say anything else about it right now. Just keep your fingers crossed for me that it all works out!

In the meantime, I need to find a reliable source of affordable beaters so that I can produce plenty of clocks, both to sell on Etsy and at craft shows and possibly to wholesale to boutiques. I normally buy the beaters at thrift stores and on eBay, but the supply can be somewhat unpredictable. Brand new replacement beaters are easy to find, but they sell for about $15 bucks a pair. Ouch.

My clever boyfriend suggested that I contact the companies that make the electric mixers and see if they'll tell me where they get their beaters. Surely there must be some factory seconds that I could snap up for a song. My guess is it will take more than a few calls, but hopefully it will be worth it.

Saturday, November 08, 2008

Mosaic Magic 8-Ball

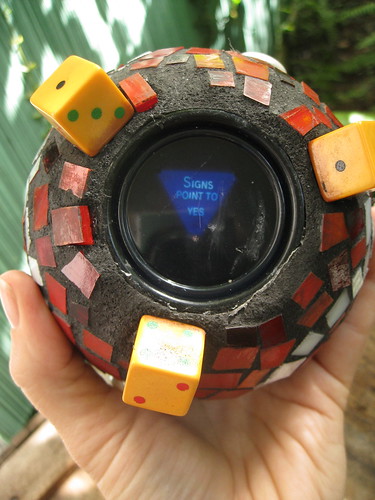
mosaic magic 8-ball
Mosaic Magic 8-Ball
Originally uploaded by sassycrafter
We've all heard the expression, "When in Rome, do as the Romans do," but there's no need to be in Rome to create your own mosaic. This tesselating art form adorned countless Roman villas and can still be used to cover any number of exposed surfaces--floors, walls, and even Magic 8-Balls.

What you need:

+ Magic 8 Ball
+ Masking tape
+ Mosaic tiles
+ Metallic marker
+ Adhesive
+ Game pieces
+ Gloves
+ Grout
+ Sponge

What to do:

1) Find a Magic 8-Ball or other object that that you want to sass up (boxes, bowling pins, and bowling balls all work). If you're using a Magic 8-Ball, cover the message window with masking tape so that it's protected from any stray adhesive in step three.

2) Use a glass cutter and running pliers to create mosaic tiles from stained glass. If you've never worked with these tools, search the Internet for tips on cutting glass, or just buy a pack of mosaic glass tiles from your local craft store.

3) Sketch a design on the Magic 8-Ball using a metallic permanent marker. Start by gluing down the non-tile elements with a strong adhesive (try Liquid Nails or another strong adhesive). Add Scrabble tiles that spell "chance," three dice to act as feet, and a colorful game piece to top things off. Then start gluing your tiles in place, starting with outlined areas and then filling in. Let the adhesive dry.

4) Cover the Scrabble tiles and dice with masking tape. Put on a pair of rubber gloves and apply sanded grout to the mosaic, taking care to press the grout firmly into all cracks. Let the grout sit the recommended time (read the grout instructions). Use a sponge to wipe the tiles with a damp sponge until the haze is gone.

5) Once the grout cures, you'll have a funky fortune-telling sculpture!

Mosaic Magic 8-Ball

Mosaic Magic 8-Ball

Thanks to Julie Charles of Crackpot Mosaics for the inspiration for this project.

This project originally appeared in the November issue of Satellite magazine.

Thursday, October 30, 2008

Happy Halloween!

Tomorrow's Halloween, my favorite holiday! I'm still deciding what I'll dress up as for the two parties I'll be attending (post-event photos to follow). In the meantime, I couldn't resist sharing these fabulous shoes with you. 

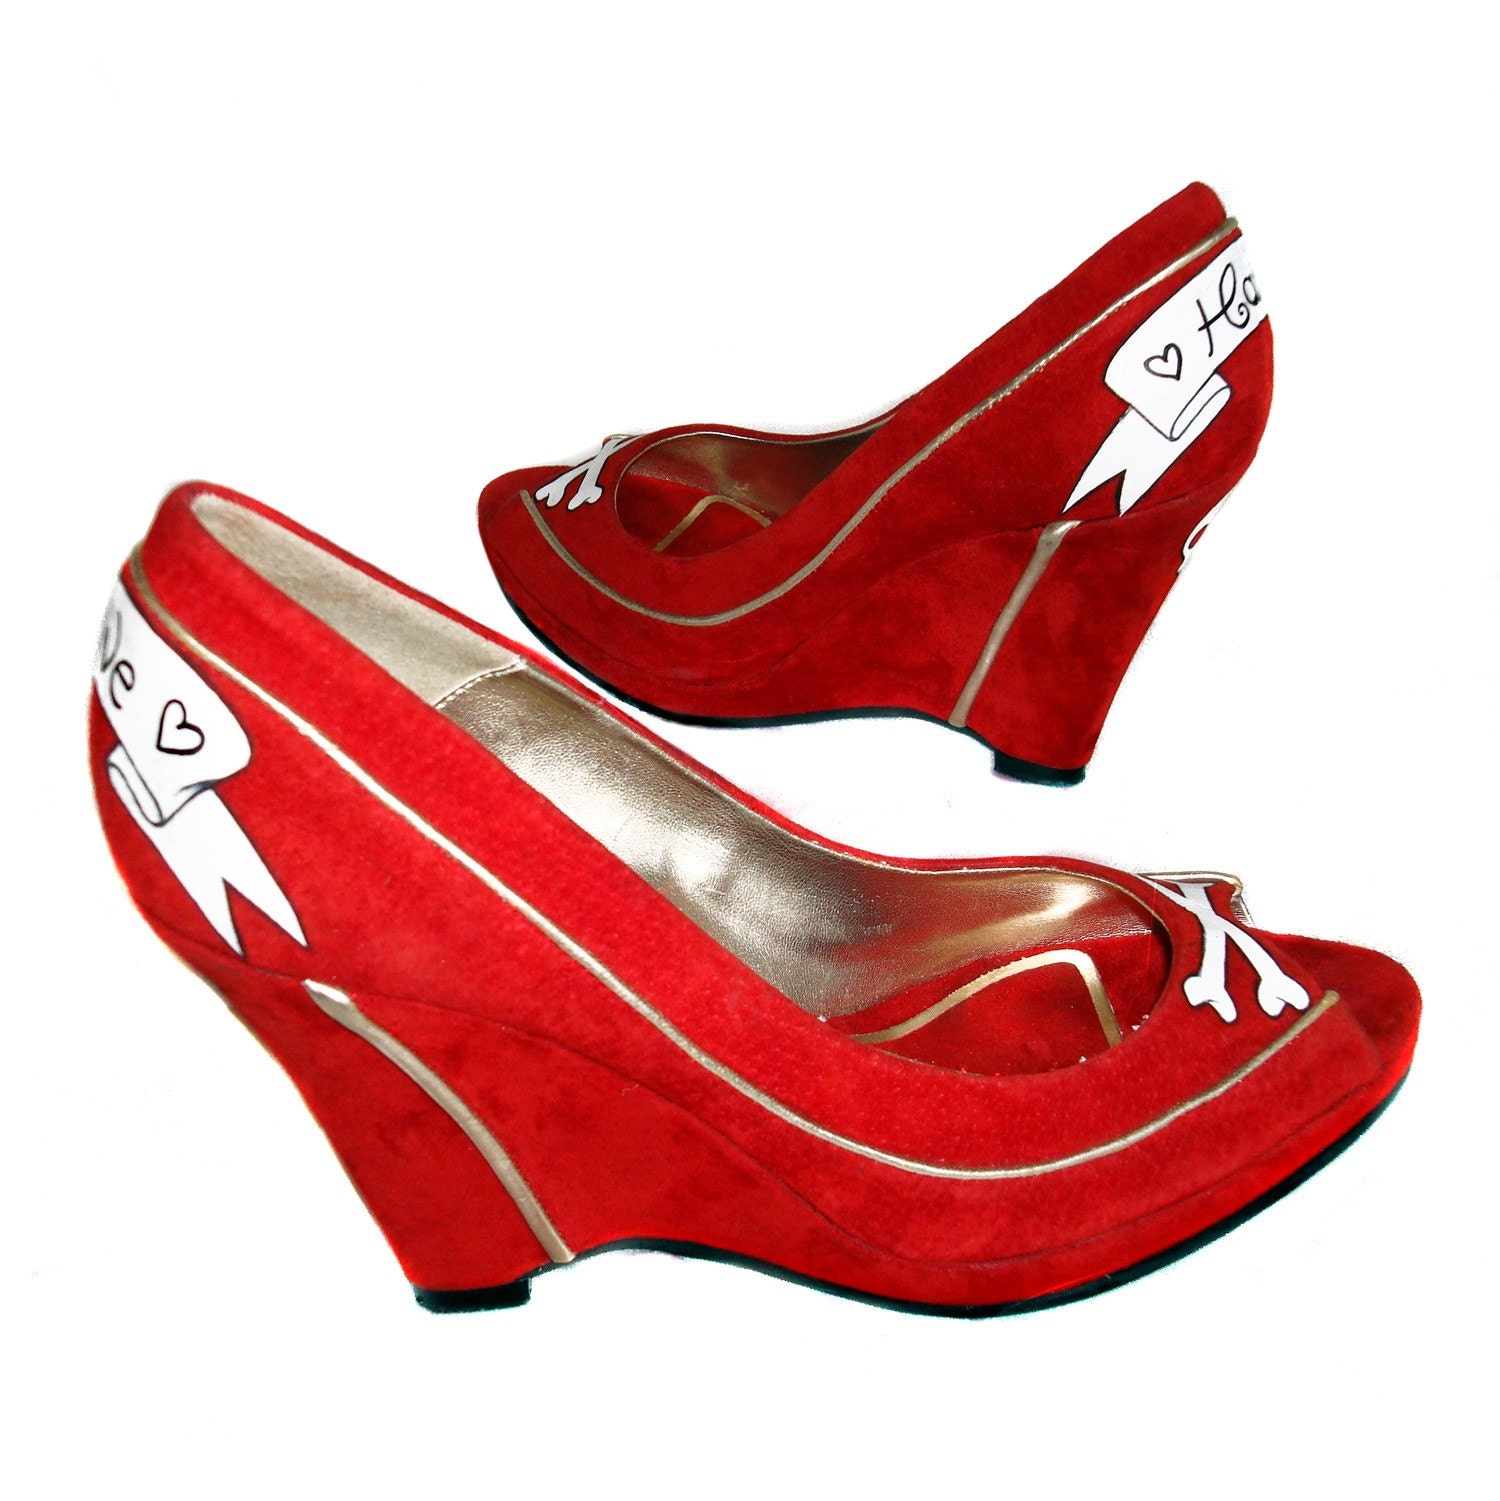
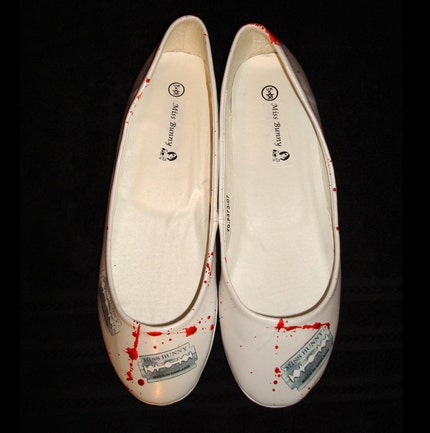
Miss Bunny takes gently used shoes and upcycles them into one-of-a-kind creations. 

Check out these love/hate wedges in apple red. Wouldn't they just be spectacular with a vintage pin-up girl outfit? I'm picturing a pair of short shorts and a cute blouse, along with a swanky 19040s hairdo.


And then there are these blood-spattered shoes with razor blades on them. Perfect for that gory nurse outfit! 


Miss Bunny also made some bat heels that'll make you flip. I'm thinking they'd look great with an understated black strapless dress, some black opera-length gloves, and a little black hat with a veil. 


Well, I hope all of you have equally smashing costumes to wear. My guess is that if you're reading this blog, you probably have the creative costuming bug in you.

Have a fabulous Halloween!


Saturday, October 18, 2008

Easy Art!


Easy Art!
Originally uploaded by sassycrafter
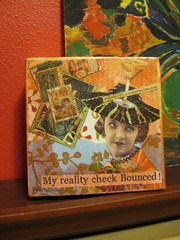
If you're looking for some affordable new art to hang on your wall, look no further than your napkin drawer. A number of manufacturers are making paper napkins that are so beautiful they're almost art. All you need to do is attach a napkin to a canvas, add a few finishing touches, and you'll have a new masterpiece.

What you need:

+ Napkin
+ Canvas
+ Paint
+ Paint brush
+ Scissors
+ Gel medium
+ Embellishments

What to do:

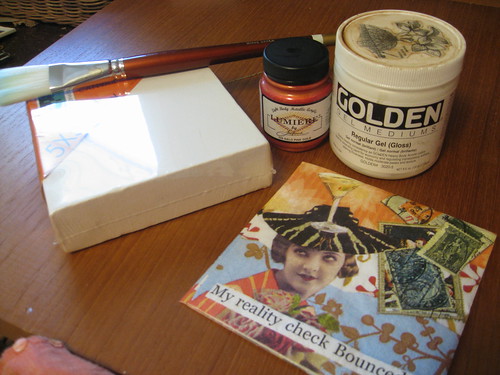
1) Artsy gift stores and galleries often stock unique cocktail napkins so look there for a napkin that suits your artistic taste. Then visit your local art supply store and buy a canvas that's slightly bigger than your napkin. If you'd like to pay homage to Andy Warhol, you can repeat four images on one canvas--just buy a larger canvas. Assemble your supplies.

Assemble supplies

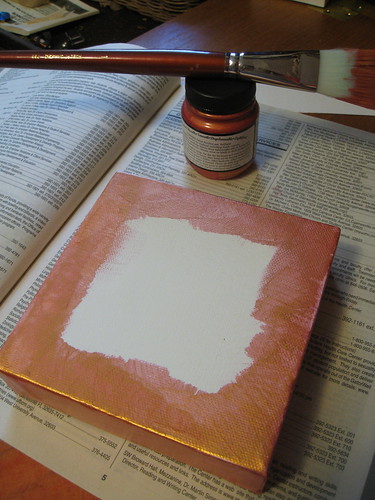
2) Paint the edges of the canvas using a color that coordinates with the napkin and let dry. (Tip: Use an old phone book to protect your work surface and you'll have a clean surface each time you turn the page.)

Paint edges of canvas

3) Trim the napkin to fit the canvas and attach using gel medium. Then add a top coat of gel medium.

Add top coat of gel medium

4) Attach a few embellishments to add depth and texture--a used postage stamp, a few beads to act as a necklace and earrings, and a word from a vintage dictionary. You're done! Hang your new art on the wall and enjoy.

Remember that the artwork on these napkins is copyrighted, so don't try selling these canvas creations on Etsy or eBay!

This tutorial originally appeared in the October issue of The Satellite.

Wednesday, July 02, 2008

Summer shrug


Summer shrug (front)
Originally uploaded by sassycrafter
This fun summer shrug will be featured in the July issue of The Satellite and is a great way to chase away the chills when you're strolling through the frozen section of the grocery store or heading to the movies. It's made from an oversized, open-weave sweater that I scored at a thrift store.

If you'd like to make your own shrug, here's what to do.
  1. Start by cutting the sleeves off of an old sweater. The trick is to cut outside the seamline so that the sleeves won't unravel.
  2. Then take a contrasting yarn and whipstitch around the raw edge of each sleeve. I also added a gathered section of yarn that runs from my elbow to the cuff, because I wanted to have a three-quarter sleeve.
  3. Finally, use a piece of yarn to lace the two sleeves together. You may have to put on the shrug a few times and adjust the tightness or looseness of the lacing in order to get it so that everything feels okay.
In this picture, you can tell that the lacing is still a little loose. In retrospect, I guess you could use elasticized cord for a more forgiving fit.

The shrug was inspired by two different projects from Stefanie Girard's new book Sweater Surgery. It's a fun book filled with great repurposing projects, including several by me. (Yes, that was a shameless plug. Sorry--I'm still so excited to be in a book!)

Saturday, June 21, 2008

This just in! I'm in a book!

Sweater Surgery
I'm so excited I can barely contain myself -- my projects are now featured in a book! 

Sweater Surgery by Stefanie Girard is hot off the presses and contains four of my purses. You can find it on Amazon, or you can call your local independent bookstore and ask them to order it for you.

Here's a rundown of the four purses that are featured:
  • Cheerleader purse--Full pattern and directions (written by me) on pages 38-39. Also appears on pages 8 and 113.
  • Erika purse--Named for my friend Erika, who I gave this purse to for her birthday but who was kind enough to lend it back to me to send to the publisher for photographing. Basic construction info listed on page 93. Also appears on pages 7 and 92.
  • Cindy purse--Named after the woman who sold my first sweater purse through her store, Sun Center Bead Emporium (sadly, now closed). Featured on p. 94 and also appears on page 5.
  • Joan purse--Named after my dearest mother, who was kind enough to sacrifice her Kenmore sewing machine to me back in the early 1980s. Described on page 95 and also appears on page 5.
You can click on the purse names above to link to photos of these purses in my Flickr photostream.

Friday, May 23, 2008

Repurposed top


Re-purposed top
Originally uploaded by sassycrafter
I have two different silk knit tops that I love but that have gotten worn out from too many trips through the washing machine. I couldn't bear to part with these old favorites, but I realized that I wasn't wearing them anymore. What to do? Spruce them up and make them look new again, of course!

I'll lay out the steps I used to transform the short-sleeved shirt from slightly stained, drab, and worn out, to fresh, fun, and new again.

Start by selecting which garments you'd like to transform. The dye packages all say that natural fibers dye best -- I chose silk -- but I have a friend who has good luck over-dying polyester fabrics. (Sorry the photo is sideways -- technology is thwarting my efforts to straighten the shot for you.)


Then gather each shirt with narrow accordion pleats and secure each resulting snake-like bundle with rubber bands. Beware: you may experience flashbacks to tie-dye project gone awry, but you should grit your teeth and push forward. This will be way cooler than the tie-dyed shirts you made in summer camp.

Mix up the dye according to the package instructions. I used your basic Rit dye in brown -- you can see it in the measuring cup. It was hard to get all the bits of powder to dissolve, but it doesn't matter as much when you're doing a tie-dye since the outcome will be mottled anyway. The instructions said to wet the shirts and put them in hot water and then add the dye solution, so that's what I'm doing in this shot.


Dye the fabric for the recommended time and then rinse as directed. Here's what the short-sleeved shirt looked like as I removed the rubber bands.


And then as I unfurled the whole shirt.


I then washed and dried the shirt, according to the dye instructions. Then I embellished the neckline of the shirt by sewing on a gathered a section of hem tape that I had in my sewing room. Amazingly, it was the exact color as the dyed shirt! If you really care about matching, you can always dye your embellishment fibers when you dye the shirts. Then I added a decorative running stitch with a contrasting embroidery floss. I wanted another layer of texture and I thought old buttons would be just the ticket. Rather than sew them directly on the shirt and have them be droopy, I sewed them onto a piece of thick felt that I added a pinback to. That way I can also remove the buttons easily for washing. Here's a close-up of the embellishements.


Just think of what you could do with all that old stuff hanging around in the back of your closet! And if the dye process doesn't work out so well, it's no big deal since you had stopped wearing the shirt a long time ago.

Friday, January 25, 2008

A different kind of key ring

sterling key ring
I saw this fabulous ring listed on Elsewares. What a cool idea! Apparently the ring is cast in sterling silver from an actual key. I definitely don't have the metal-smithing skills to make this myself, so I'll add it to my wish list for now.

I've always had a fascination with old keys, in part because my dad's parents took us to a place called The Baldpate Inn, which has an extensive key collection. Also, my mom's father passed down a box of old keys that had belonged to my great-grandfather. I've since used some of these keys to make a couple different projects--a windchime for my mother and a lampshade for me.

key shade
Elsewares also has other darling things, like a fly catcher necklace, a sterling bird necklace, and the Um tote. I'm in love with the tote because not only is a made of felted wool, but it also folds flat. Very clever.

Sunday, January 06, 2008

Clever keychain


Thanks to Cat for inspiring this project, which will be featured in the January issue of The Satellite magazine. It's a great way to use up odd beads leftover from previous projects. All you need is some leftover beads, flex wire, a couple of crimp beads and some imagination.

So what's stopping you? Go bling out your keychain!

Sunday, October 28, 2007

Halloween pre-weekend


In the true spirit of the sassy crafter, I cooked up this costume in nothin' flat. I stopped by Loop de Loop at around 6pm and visited with my friends Cat and Perry. Cat insisted that I try on this little green dress, saying that it looked perfect for me. Aside from being a little big, it was indeed perfect. I took it home thinking that one day I'd transform it into the perfect cigarette girl costume.

So I get home, eat some chow, and commence watching Game 3 of the World Series. Sometime after 9pm I get inspired to start transforming the dress into the envisioned cigarette girl costume. Around 10pm I get a call from Cat saying that she's on her way to a Halloween party and that I should join her and her friends. Sewing complete, I move on to the other critical details of the costume -- the pillbox hat and the tray featuring cigarettes and candy. I frantically empty the change from the little basket that I keep on my dresser, and then go digging in my utility shed for black spray paint. Bingo.

As the paint is drying I rush inside to put on a smattering of make-up. After all, a cigarette girl's look isn't complete without deep lipstick and false eyelashes. Then I remove the dust cover from my turntable so that I have a tray, and raid the nicotine I keep stashed in my freezer. One final stop at Walgreen's for some candy and I'm ready to roll.

Needless to say, the costume was well receieved. Of course, why wouldn't it be if I'm offering people free drugs and candy?

LinkWithin

Blog Widget by LinkWithin